Fresh-Leaf Indigo Dyeing We have been growing Japanese Indigo, Polygonum tinctorium, for several years. Our original seed came from Rita Buchanan's 2003 seed crop, which, in turn, was a direct descendent of seed she received from Dorothy Miller in 1985. Indigo seed is reputedly very short lived, so we are diligent in collecting fresh seed each year. This takes some effort, gardening where we do in Madison, Wisconsin, as indigo seed matures very late in the fall, usually after a killing frost. Either we bring flowering cuttings indoors to mature, or grow a few plants in a pot and bring the potted plant inside until the seed matures (usually November in southern Wisconsin). Other than the need to ensure seed for the next year's crop, indigo is an easy, trouble-free plant that grows well in full sun in any good garden soil. Plants can be started indoors, 4-6 weeks before a frost-free date for garden planting, or sown directly in the soil. Plants started inside will usually be ready for dyeing a few weeks before those directly sown. With plants started inside and planted out in early June, we are able to begin harvesting leaves in early August and to continue dyeing through September with excellent results. A sign that the leaves are ready to be used is blue color where a leaf is nibbled by an insect or is torn. The leaves that grow during hot weather seem to have more color potential than those that develop later in the fall. Every year since we began growing indigo, we have used freshly picked leaves to dye wool using the guidelines in Rita Buchanan's book, A Dyer's Garden, to obtain a range of traditional indigo blues. We put the leaves (whole, not shredded) in a stainless steel pot, and cover them with very hot tap water. Our local water is hard, but the hot water has been softened. Next, in order to extract the dye, we put the leaf-filled pot into a larger pot, making a sort of double boiler, and then, over a two-hour time period, slowly heat the leaf-filled pot to a temp of 160º F. We then strain the liquid, squeezing as much liquid as possible from the leaves. The strained liquid is made alkaline with either baking soda or ammonia (one or the other, not both in the same batch) at a rate of about one tablespoon for each half-pound of leaves, providing a mildly alkaline solution of about pH 8. This year, Rhoda made a batch using ammonia to give a pH of 11, which also dyed well. Once the liquid is made alkaline, air is added by pouring the liquid back and forth between two pots for five or so minutes. The final step of this part of the process involves reducing the solution by adding about one tablespoon of Spectralite (thiorea dioxide or thiox) per half-pound leaves. The dye bath is maintained at a temperature between 100º and 120º F, and after about an hour should have turned from blue to a greenish yellow. At this point, it is ready to use for dyeing. Wool, either unmordanted or mordanted with alum (we have used both), is soaked in the bath for 20 minutes, aired for 20 minutes to develop the color, and then soaked and aired again as needed until the desired depth of color is achieved. Since the leaves are usually wet with dew when we pick them, it is difficult to know exactly what they weigh, and therefore difficult to say the weight of leaves needed to dye a given amount of wool. The one time we had dry leaves, two pounds of leaves dyed one pound of wool a deep color. Check the pH with pH paper and verify reduction by the change of the solution to a greenish yellow color. The process is somewhat flexible. There will always be variation in how much dye the plants have produced and differences in how different fleece types pick up the dye, but as long as one achieves an alkaline pH and a properly reduced solution, good results should follow. This year we had a new recipe to try. Earthues sent instructions for using fresh leaves to get a blue-green on wool. The essential part of this method is to work as quickly as possible in all phases of the procedure. Leaves are picked, packed into a blender with a bit of room temperature water, and pulverized. The resulting green broth is strained through a paint straining mesh bag and the wool (mordanted with alum at 20% wof) put directly into the green liquid. Our dye vessel was a plastic bucket and we used just enough water to cover the wool. We used 400 leaves per dye batch and put 2 ounces of wool into the bath at a time. The wool soaks for 10 minutes, is exposed to air for 10 minutes and then soaks for another 10 minutes. Repeated soakings and airings give increasingly deep colors, but the shade of blue-green from the first immersion is quite acceptable. The dye bath is good for only 30 minutes and does not give much blue-green color after this, but it can be used for other colors. Wool simmered in the remains of the dye bath gives a rich gold, and wool left to sit for 2 days at room temperature gives a lovely spring green. Wool dyed the blue-green color and then simmered the next day in the remaining liquid gives a deep yellow-green. Results of tests for light fastness are still pending, but bits of wool dyed with the blender method and left lying about in the house seem not to be fading. A sample left in a sunny window lost its green cast, so we suspect the green component is less light fast than the blue. A sample of wool dyed using the reduced vat method and left in a sunny window for a year lost very little color. We are both members of a local spinning group. Ruth uses her yarns for knitted garments and Rhoda uses hers in Navajo rugs. We are both avid gardeners and find growing indigo to be a very satisfying way to combine our love of gardening and natural dyeing. The two of us are extremely pleased with the variety and quality of color from this plant and will continue experimenting with and learning how to use it.
by Ruth Cadoret and Rhoda Braunschweig
Left: Guatemalan indigo vat. Middle: Darkest fresh leaf blender Polygonium. Right: Lightest fresh leaf blender Polygonium.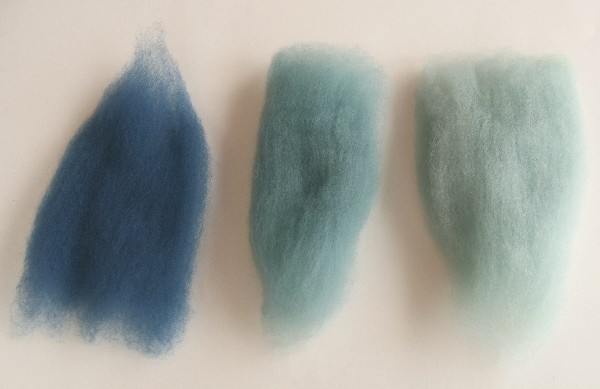
Left to right: Guatemalan indigo vat; fresh leaf blender Polygonium;
2-day room temperature soak in exhausted blender bath;
1-hour simmer (160º F) in exhausted blender bath.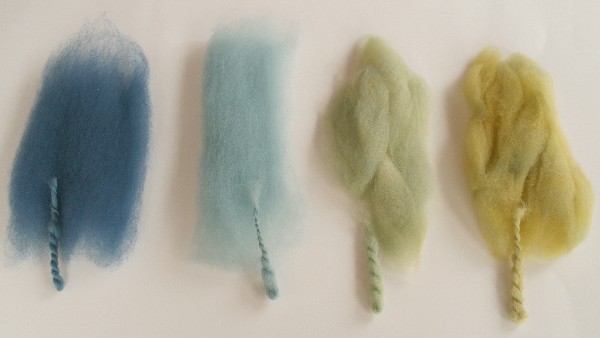
Comparison of dyeing on white wool (left) and light grey wool (right).
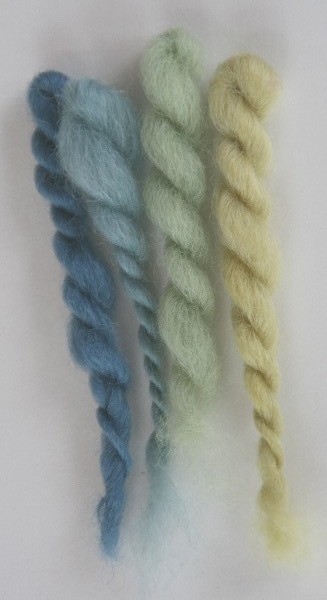
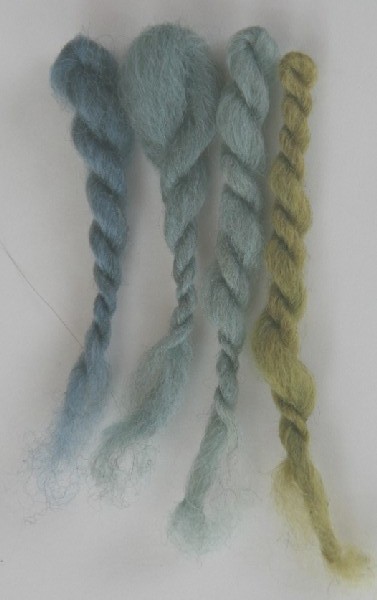
Left to right in each photo: Guatemalan indigo vat; fresh leaf blender Polygonium; 2-day room temperature soak in exhausted blender bath;
1-hour simmer (160º F) in exhausted blender bath.
Photograph Copyright by David Braunschweig
Photograph Copyright by David Braunschweig
 Turkey Red Journal
| Volume 13 Issue 2 | A Journal Dedicated to Natural Dyes | Spring 2008 |
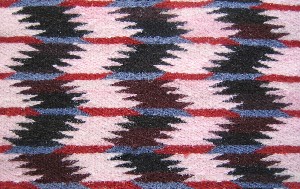
Photograph Copyright by Pamela Feldman
In this Issue
Articles:
• Painting with Indigo
• Falling Leaf Shibori
• Book Review:
Dominique Cardon
Natural Dyes: Sources,
Tradition, Technology
and Science
Nature's Gallery:
• Tanya Vaidya
Events:
• Blue
Carded bats of dyed white wool.
Photograph Copyright by David Braunschweig
Dyed white wool.
Photograph Copyright by David Braunschweig